简介
以下操作将在vitualbox的一台ubuntu虚拟机上完成。IP为192.168.56.156
安装
ubuntu 源安装
-
安装
apt-get install nginx -
启动
sudo /etc/init.d/nginx start -
验证
nginx 默认设置了 80 端口的转发,所以我们可以
http://192.168.56.156/
源码安装
-
安装依赖
apt-get install libpcre3 libpcre3-dev zlib1g-dev -
安装
./configure
configure时,如果什么参数都不带,则会采用以下配置
   nginx path prefix: "/usr/local/nginx"
   nginx binary file: "/usr/local/nginx/sbin/nginx"
   nginx configuration prefix: "/usr/local/nginx/conf"
   nginx configuration file: "/usr/local/nginx/conf/nginx.conf"
   nginx pid file: "/usr/local/nginx/logs/nginx.pid"
   nginx error log file: "/usr/local/nginx/logs/error.log"
   nginx http access log file: "/usr/local/nginx/logs/access.log"
   nginx http client request body temporary files: "client_body_temp"
   nginx http proxy temporary files: "proxy_temp"
   nginx http fastcgi temporary files: "fastcgi_temp"
   nginx http uwsgi temporary files: "uwsgi_temp"
   nginx http scgi temporary files: "scgi_temp"
make & make install
这种方式下,要么直接启动应用程序,要么自己网上找一个启动脚本放在/etc/init.d下
负载均衡
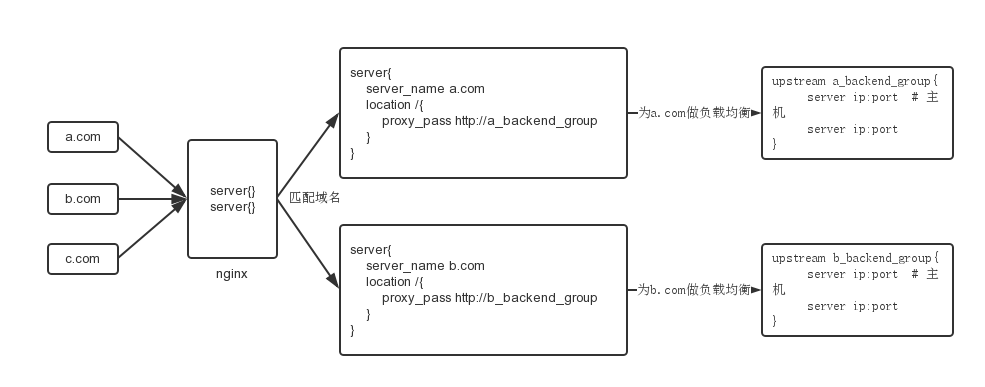
作为负载均衡的配置来讲,最终要的便是描述清楚
- 有哪些主机可以提供服务;
-
如何将请求映射到主机上。

配置步骤:
-
在ubuntu上安装两个tomcat(tomcat和tomcat1),端口分别使用8080和8081
要使用压缩版(非安装版),对于新增的tomcat1,不仅要改其8080端口(http访问端口),还要改其shutdown端口(默人8005)和JVM启动端口(默人8009),启动两个tomcat。
-
配置nginx
nginx 的默认配置文件位于
/etc/nginx/nginx.conf。为了配置文件的可读性,很多项的配置可以单列一个配置文件,由nginx.conf来include这些文件。此处,我们将子配置文件放在/etc/nginx/conf.d目录下。进入
/etc/nginx/conf.d目录,编辑server{ listen 80; server_name lqk.io; # 可提供服务的主机名 location / { # 对请求的路径进行更进一步适配 proxy_pass http://backend; proxy_set_header Host $host; proxy_set_header X-Real-IP $remote_addr; proxy_set_header X-Forwarded-For $proxy_add_x_forwarded_for; } } upstream backend { server 192.168.56.156:8080; server 192.168.56.156:8081; }/etc/init.d/nginx start启动nginx,可以进入/var/log/nginx/error.log查看是否出错,以及出错的具体信息。 -
访问nginx
想要在windows客户端访问
http://lqk.io,需要windows识别lqk.io域名,可以配置windows的C:\Windows\System32\drivers\etc\hosts。然后在浏览器输入http://lqk.io即可。